10 real-world vibe coding examples to jumpstart your AI workflow
Share 10 real-world vibe coding examples to jumpstart your AI workflow
Explore more from
Design basics
From wireframe to website, faster
Design, prototype, and refine every page.

Vibe coding is changing how we build products. Thanks to prompt-to-code workflows, you can create a functional app just by describing it.
Checking out real vibe coding examples is the fastest way to see what’s possible. These projects show how tools like Figma Make can turn almost any idea—from a 3D game to a complex dashboard—into an interactive prototype in seconds.
Read on to learn:
- 10 real-world examples of vibe coding
- How to start vibe coding with Figma
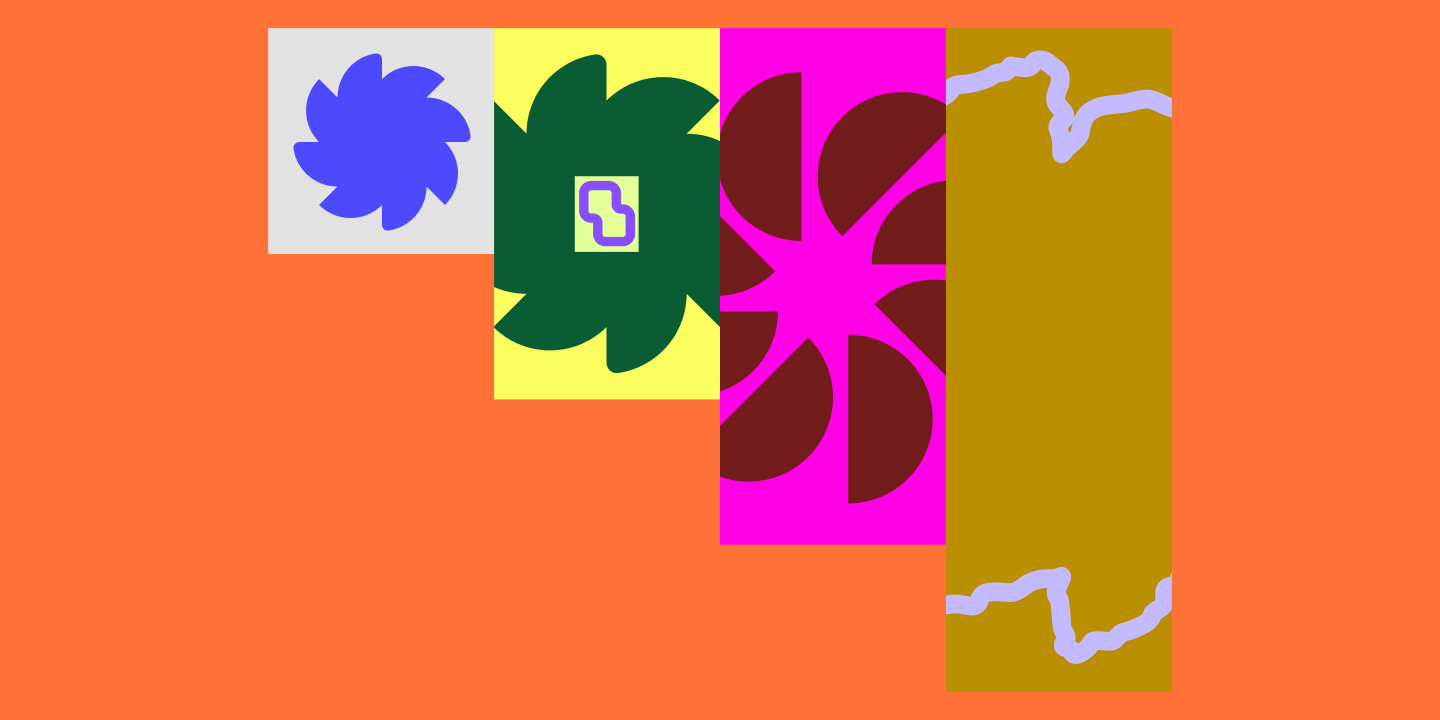
Example 1: Liquid glass material editor

Inspired by the visuals at Apple’s WWDC25, this liquid glass material editor recreates how glass bends images and picks up light from its surroundings. You get a draggable glass shape layered over a background image. Move it across the canvas and watch the material react to the environment beneath it.
Built entirely with Figma Make, the tool lets you tweak the saturation, blur, distortion, and color to get the look you need. You can even change the glass’s shape or add custom text inside it. It proves that vibe coding tools can build highly customizable apps.
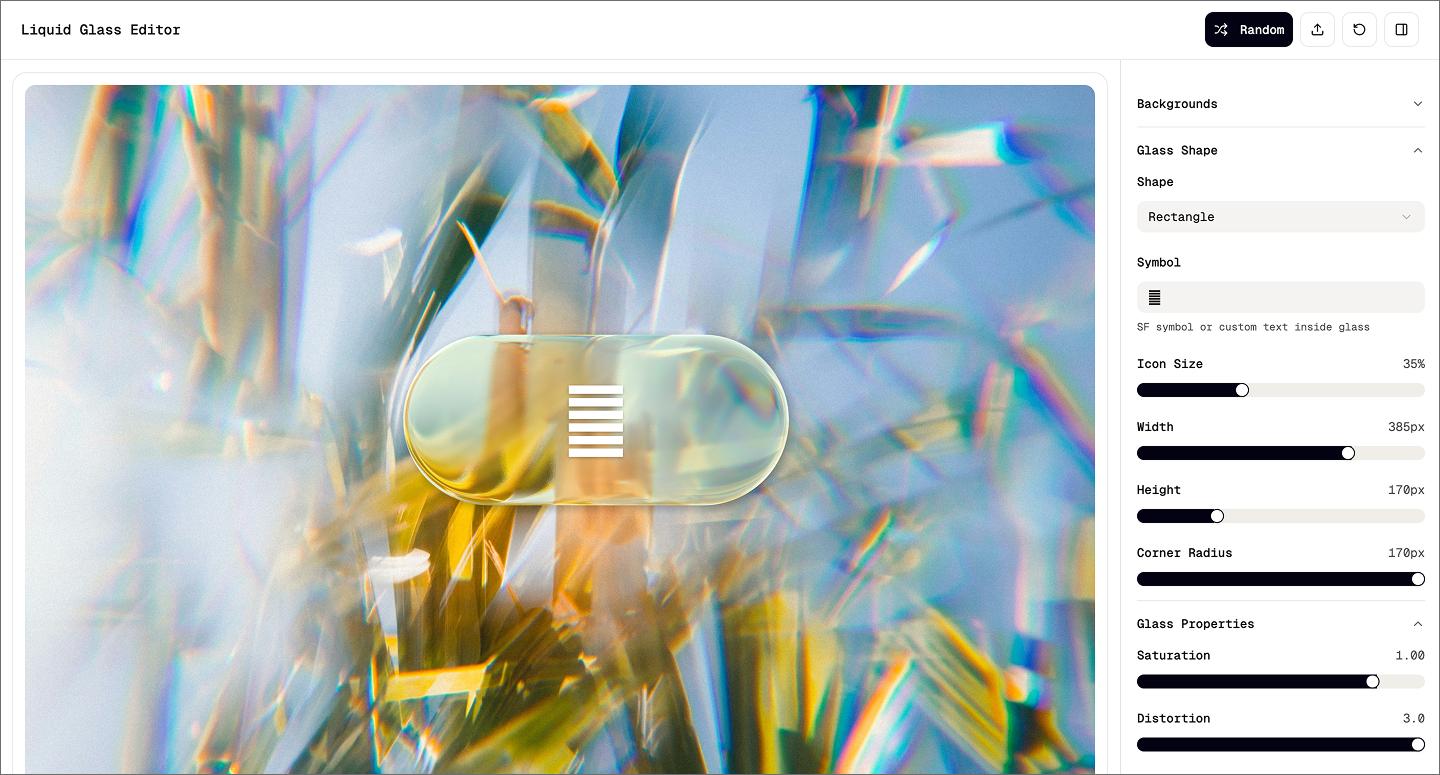
Example 2: AI-powered task scheduler dashboard

This AI-powered dashboard turns a messy list of work orders into a clear, visual timeline. The left sidebar keeps everything organized with priority filters and detailed task cards, while a purple scheduler button and a smart insights panel help automate the planning process. It shows how vibe coding handles high information density, like Gantt charts and technician workload heat maps.
Example 3: Android music player
![[alt text: Screenshot of an Android music player made using Figma Make.]](data:image/jpeg;base64,/9j/2wBDAAYEBQYFBAYGBQYHBwYIChAKCgkJChQODwwQFxQYGBcUFhYaHSUfGhsjHBYWICwgIyYnKSopGR8tMC0oMCUoKSj/2wBDAQcHBwoIChMKChMoGhYaKCgoKCgoKCgoKCgoKCgoKCgoKCgoKCgoKCgoKCgoKCgoKCgoKCgoKCgoKCgoKCgoKCj/wAARCAALABQDASIAAhEBAxEB/8QAGAAAAwEBAAAAAAAAAAAAAAAAAAQGAwj/xAAmEAABAwEGBwEAAAAAAAAAAAABAAIDEQQFBhIxYQcUIzJRUnGB/8QAFgEBAQEAAAAAAAAAAAAAAAAAAAEC/8QAFREBAQAAAAAAAAAAAAAAAAAAABH/2gAMAwEAAhEDEQA/AOl7VC7lJGwkNkLSGnwaKK4Z3ZiKwTXmcR2sTsfJ0RmzU32+K6l0/EndzQ0Pp7E6q0OuIrohZSdyEaj/2Q==)
![[alt text: Screenshot of an Android music player made using Figma Make.]](https://cdn.sanity.io/images/599r6htc/regionalized/46a14e5e3dc59a951142c42518dbedc0190b1d0a-1440x775.jpg?w=1440&h=775&q=75&fit=max&auto=format)
This Android music player uses a retro record-player aesthetic to create a fully functional prototype. Hit play, and the record on the screen starts spinning. You can browse the library, toggle shuffle, and adjust the volume just like a real app.
Prompting the motion and logic means you don’t have to wrestle with complicated prototyping rules. You get to spend more of your time testing with the interaction to see if it works.
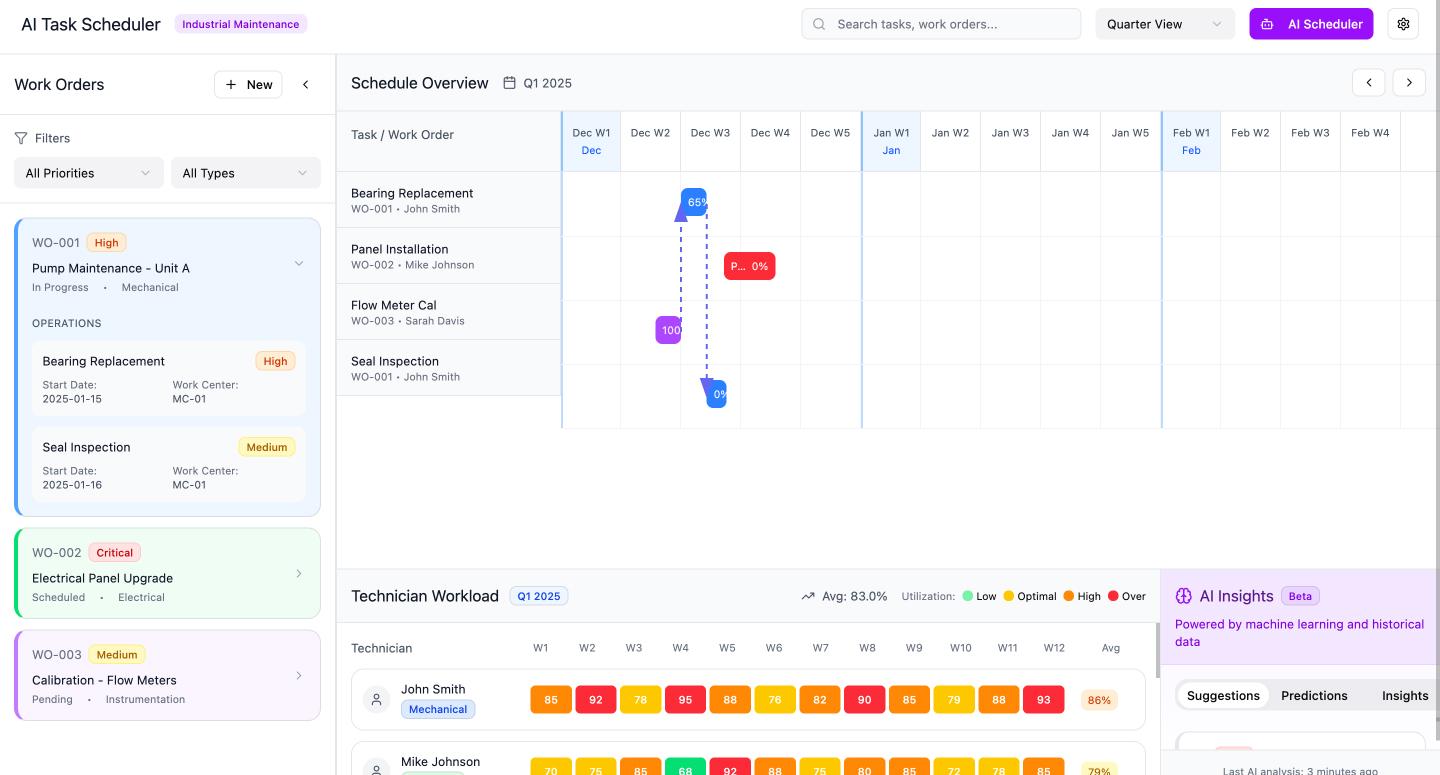
Example 4: Weekly class schedule dashboard

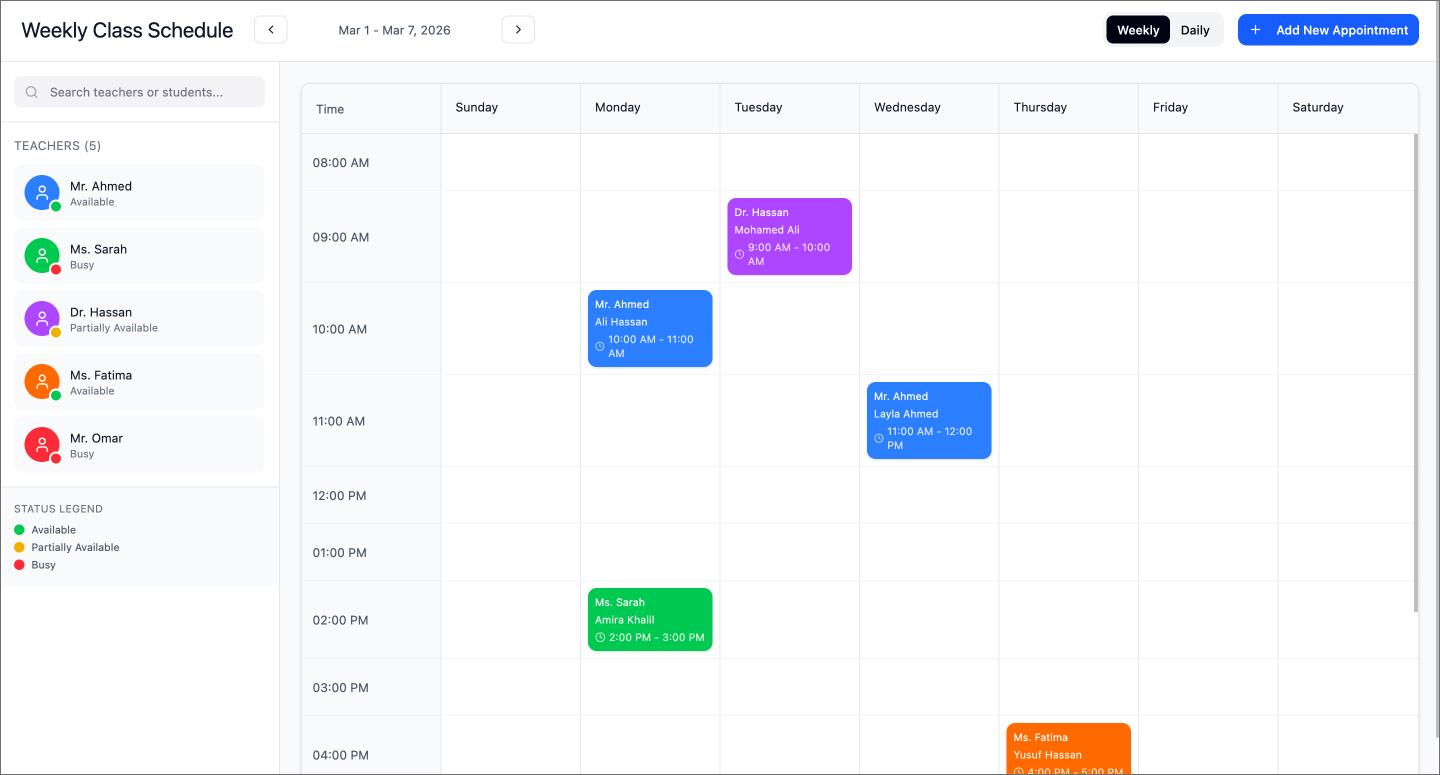
Hourly blocks and color-coded tags make this weekly class schedule look and behave like a live dashboard. You can toggle between daily and weekly views to keep track of different classes, teachers, and Zoom links at a glance.
Vibe coding works well for building personal utilities like this. Just prompt the logic for adding notes or appointments directly in the user interface (UI), and you get a workflow that fits your exact routine.
Example 5: Brick breaker game

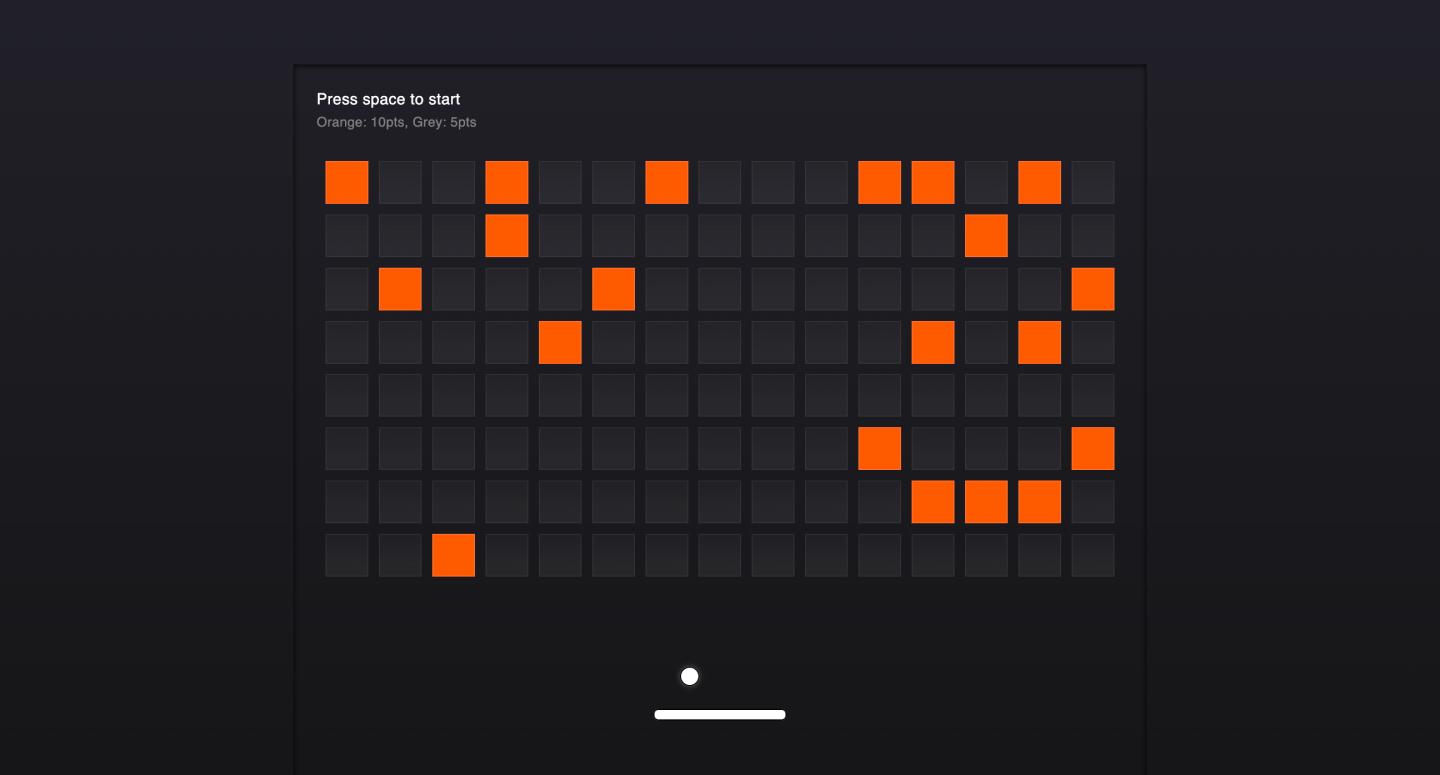
Arrow keys and a spacebar start are all you need to play through this classic brick breaker game. It tracks your score as you clear the board, giving you a classic arcade game feel.
Building a game like this is a stress test for logic. Vibe coding takes care of the math behind the physics and collisions, leaving you free to design the level layouts and how the difficulty ramps up.
Example 6: 180-degree product rotation viewer

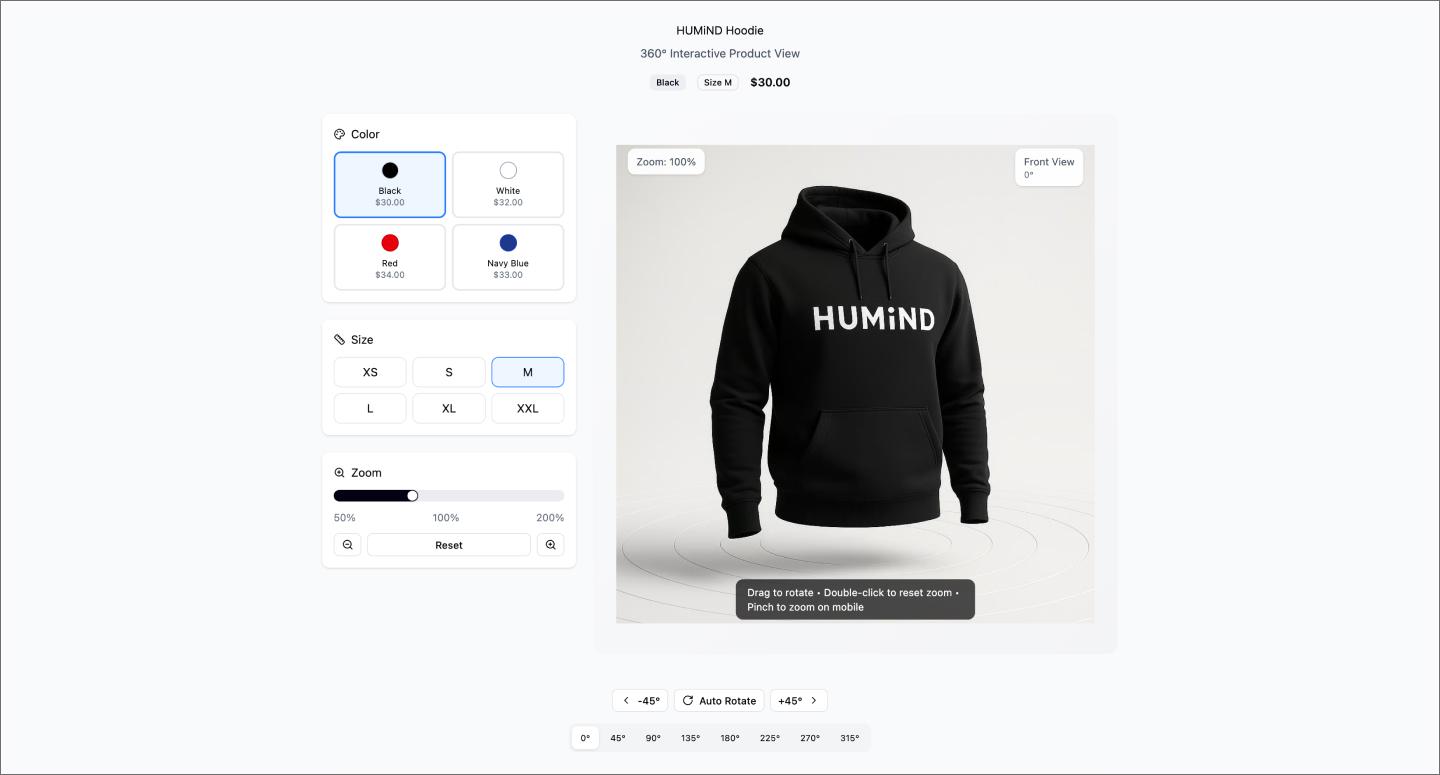
Dragging your mouse to spin this hoodie 180 degrees makes this product rotation viewer feel like a live product page. It includes toggles for color, size, and zoom to let you inspect the item from every angle.
Vibe coding handles the tricky part of mapping the mouse movement to the rotation. You can drop in your own product shots and have a high-fidelity prototype just like that.
Example 7: 3D glyph visualizer

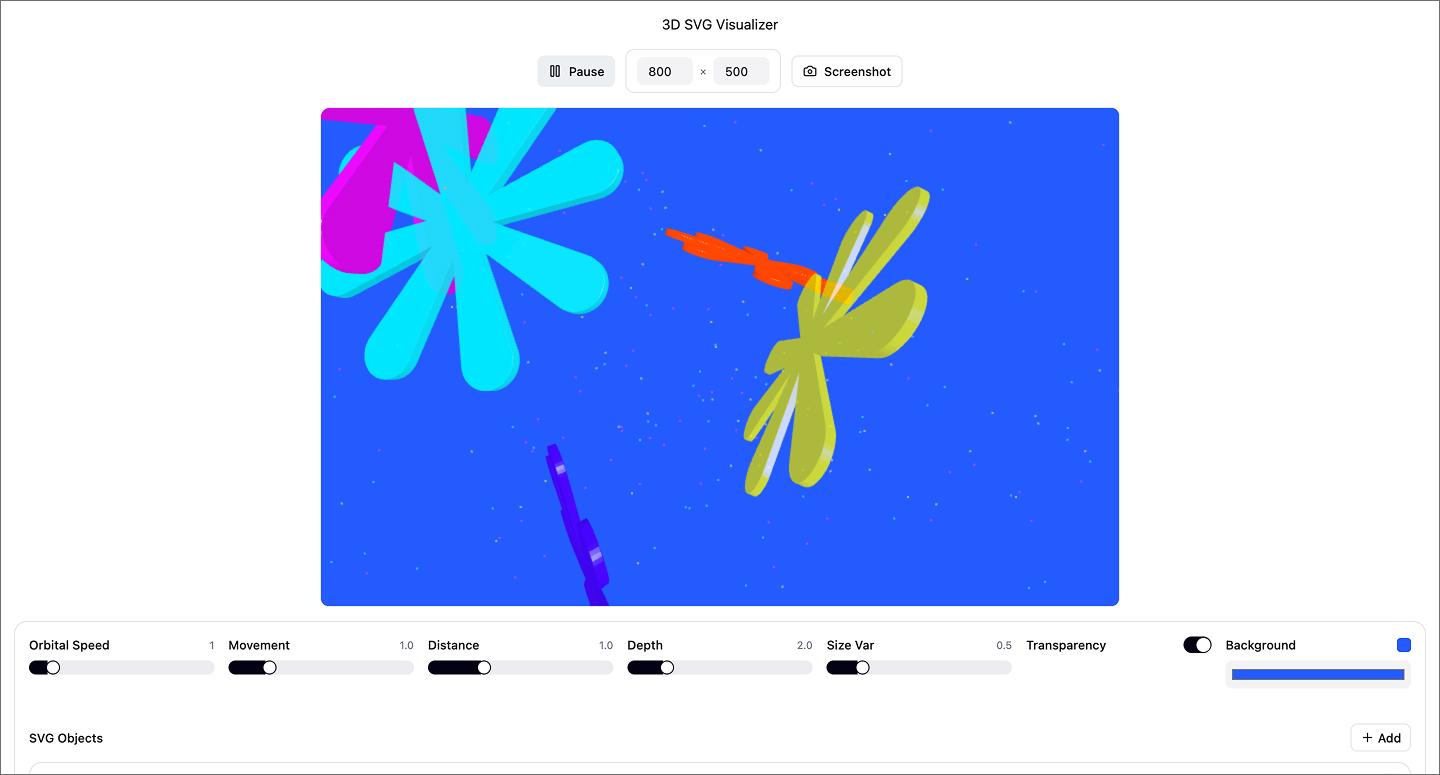
This 3D glyph visualizer turns flat SVGs into orbiting, three-dimensional compositions. Drop in any closed-path shape and play with the orbital speed, distance, and depth to see it move in space. You can even layer in your own images to ground the 3D elements in different environments.
Most designers skip 3D because the coordinate math gets complex fast. Figma Make handles the coordinate math, so you can focus on the art direction.
Example 8: Design system generator

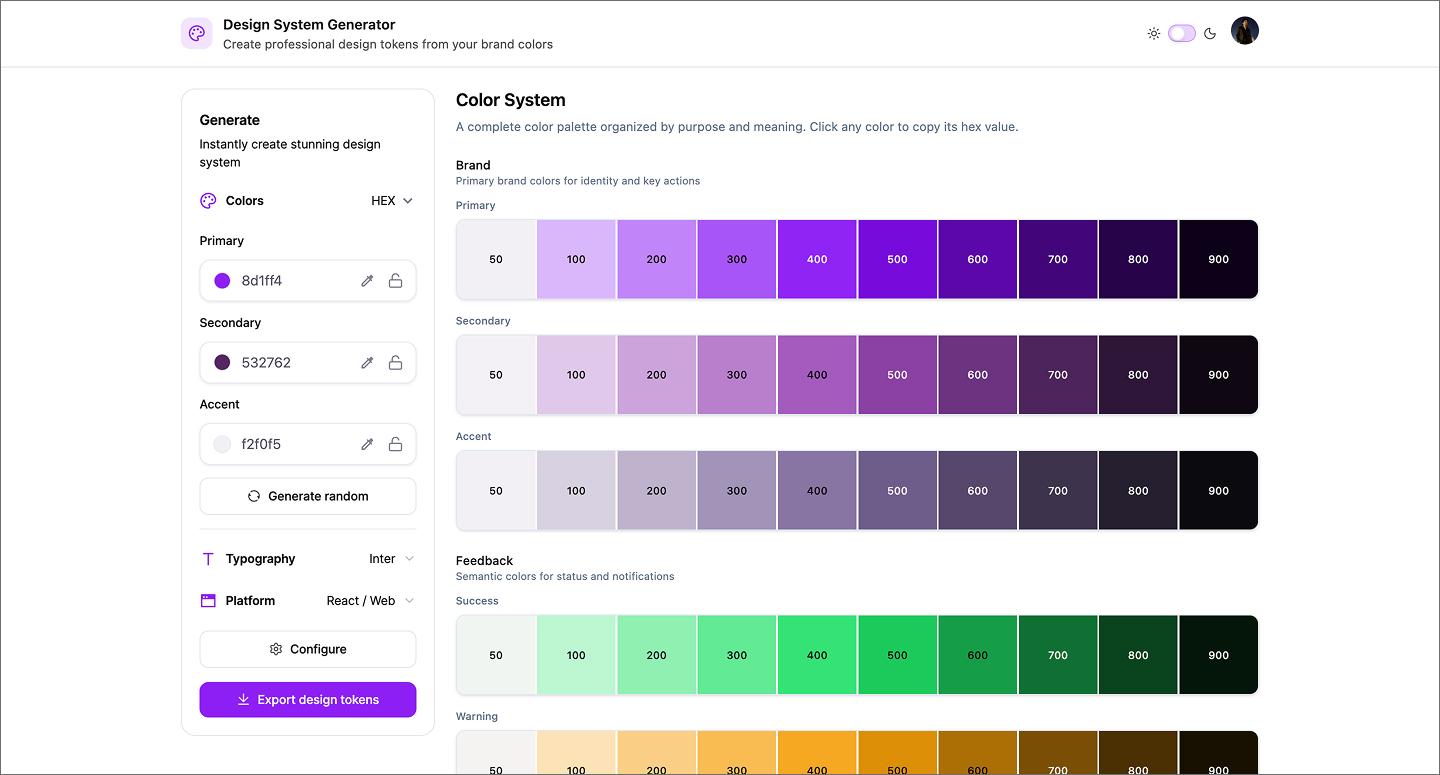
Setting up color schemes, typography, and variables from scratch is often the most repetitive part of a new project. This design system generator automates that foundation, building out reusable libraries with code exports for Flutter and React. It even syncs with Figma variables to keep everything consistent between your design and the final build.
Prompting your setup this way gives you exportable code and Figma variables right out of the gate. It handles the tedious documentation and handoff prep so you can get straight to the design work.
Example 9: Solar energy company website

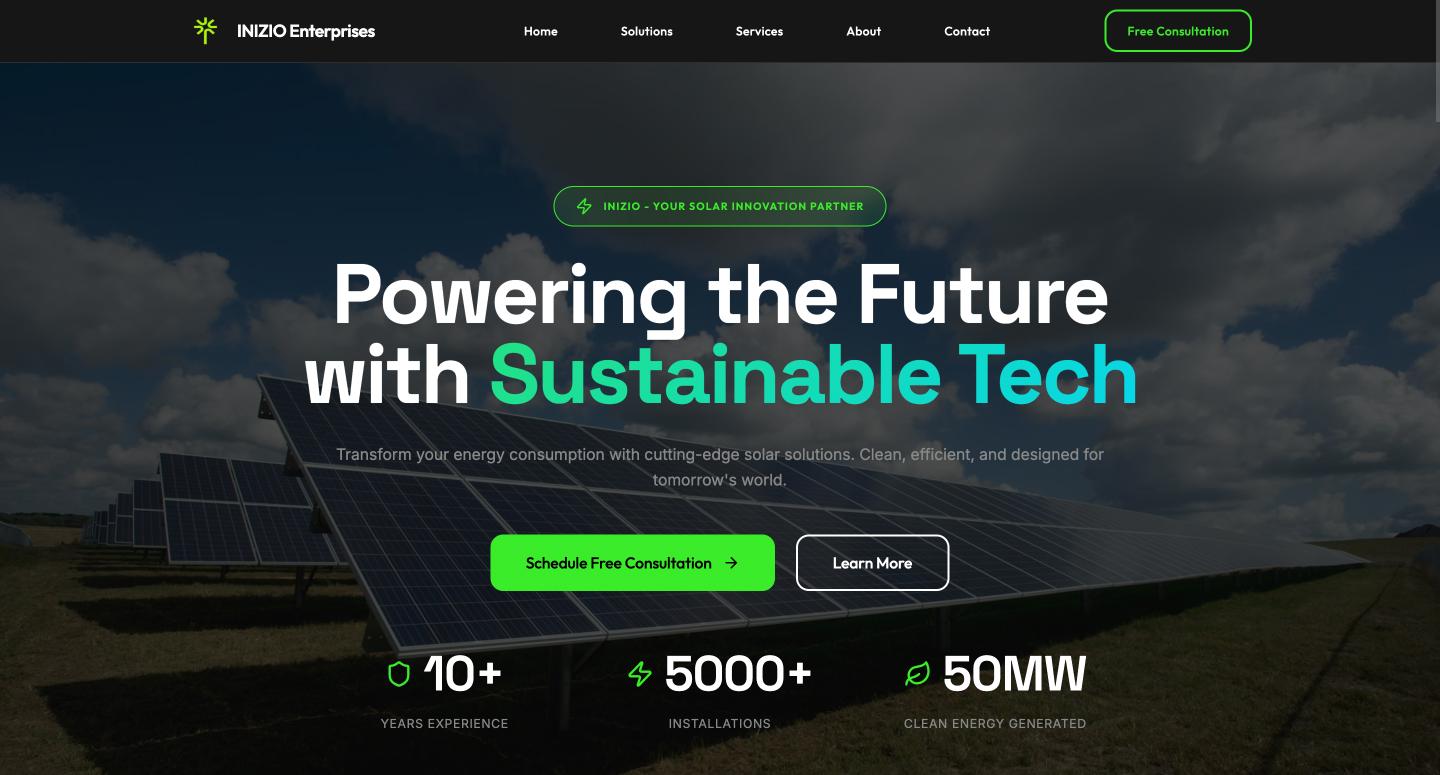
This solar energy company website uses a clean, professional layout to show how a business can quickly establish its online presence. It includes interactive touches like a newsletter signup, giving you a functional starting point for a polished site.
Vibe coding the structure of a landing page lets you experiment with the hierarchy and flow of information. You can see how the layout lands with a potential customer before moving into development.
Example 10: ATS resume analyzer dashboard

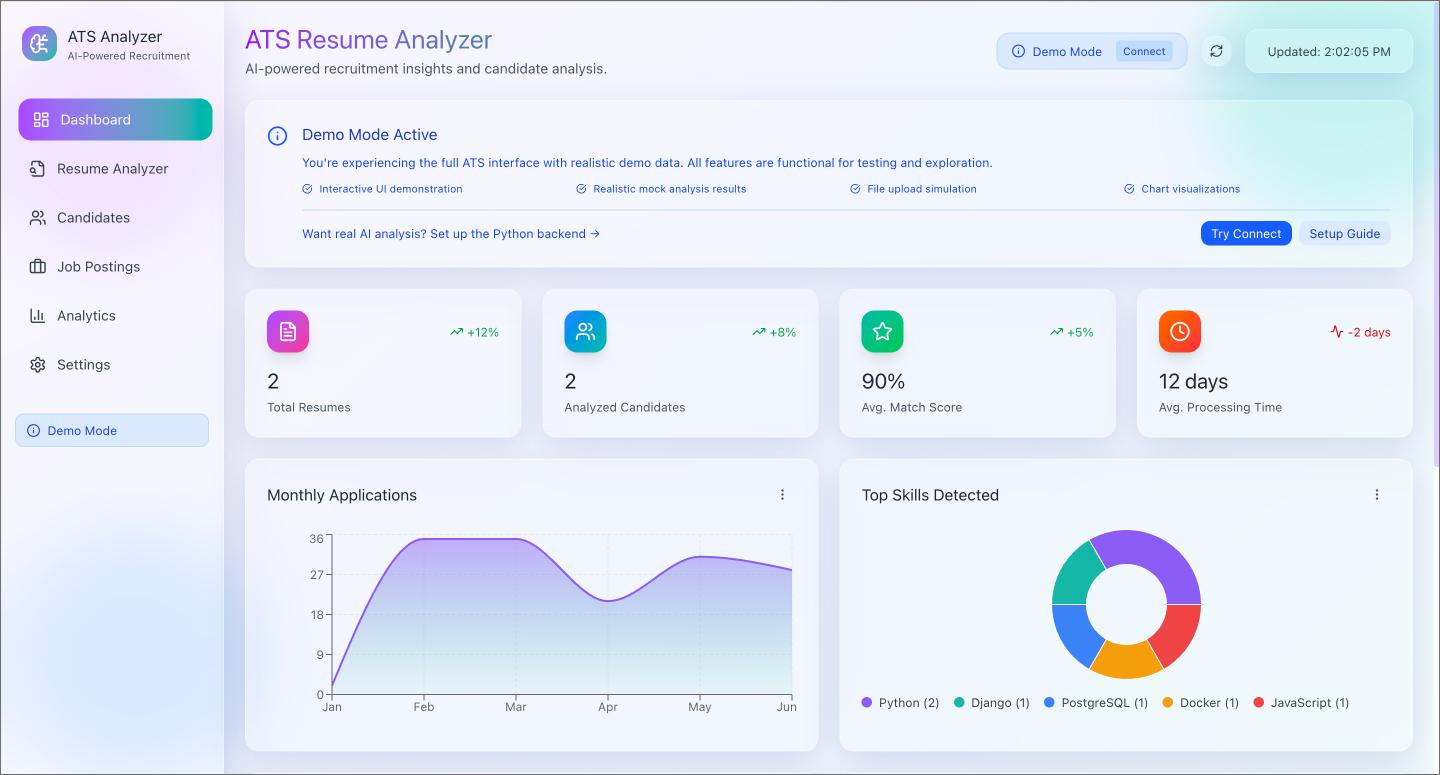
Dropping a resume file into this resume analyzer dashboard instantly pulls up applicant counts, skill breakdowns, and hiring reports. It mimics a live applicant tracking system (ATS), using realistic demo data to show how a hiring team might manage their pipeline.
Prompting the logic for file uploads and data parsing lets you test the utility of the workflow. It’s a fast way to see if the user experience (UX) design holds up for a recruiter before you commit to a full-scale build.
How to get started with vibe coding
You don’t need to know how to write code to start vibe coding, but it does require a solid plan. Taking an idea from a rough concept to a functional build takes a few steps.
Step 1: Map the logic
Before you start prompting, you need to define how your app works. This might mean deciding where a user’s data goes once they hit submit, or which screen should pop up when a toggle is flipped.
A quick FigJam session is an easy way to figure this out. Sketching a flowchart or a rough database structure helps you visualize the “if this, then that” logic. Getting this logic down first saves you a lot of back-and-forth later.
Ready to map out your own app logic?
Use this FigJam template to define your rules and structure before you start prompting.
Step 2: Create a visual source of truth
Your vibe coding platform can’t read your mind when it comes to brand colors, typography, or button styles. The AI needs a clear visual reference to know exactly what the final product should look like.
Jump into Figma Design and build out the core screens of your application first. Setting up your base components and styles gives the AI a concrete source of truth to pull from.
Step 3: Verify the behavior
With your logic mapped and visuals set, you can use Figma Make to bring it all together. Prompt the AI with your rules to generate an interactive prototype. Then, test the interactions. Click the buttons, trigger the different states, and see if the experience transitions as expected from one screen to the next based on your original flowchart.
If something feels off, refine your prompt with clearer instructions and run it again. You iterate on your directions until the prototype behaves exactly how you want.
Step 4: Bridge the code
This final step is moving your validated design into an AI coding tool. To make things easy, Figma Make generates production-ready code right from your file.
Whether you need HTML, CSS, or React, Figma Make generates the front-end structure from your prototype. From there, you can deploy using Figma Sites or drop the code into Cursor or Replit to wire up the backend. You go from layout to live product in just a few clicks.
Start vibe coding your ideas with Figma Make
The biggest takeaway from these vibe coding examples is how quickly you can validate interactions. Instead of waiting on a development cycle to see if a layout works, you can prompt the logic and test the behavior all in one place.
Here’s how to go from idea to live product using Figma:
- Use FigJam to diagram your user flows and database schema before you write a single prompt.
- Create your visual source of truth in Figma Design so your AI agent knows exactly what to build.
- Test interactions in Figma Make to verify the vibe and generate production-ready code.
Ready to start vibe coding?
Figma Make is a prompt-to-code tool that turns your ideas into working, code-backed prototypes.
Keep reading

10 vibe coding tools for building better experiences
Keep up with the latest shift in software development using vibe coding tools that allow you to create full applications from plain language prompts.

No code vs. low code: Key differences and when to use each
Understand the differences and benefits of no-code vs. low-code and when to use each approach. Plus, learn how Figma can help.